Assigning shifts using the Employee View
This topic relates to our legacy job-scheduling functionality. If you're looking for help with our new job-based scheduling feature, please refer to How job-based scheduling works.
You can schedule your employees by assigning shifts to them. The shifts, including their default start and end times and their breaks, are defined by your system administrator. When assigning a shift, you can override the default shift times and add a note for the employee.
You can assign shifts one at a time or, if you need to schedule the same shift for multiple days or users, you can assign multiple shifts at once. Or, you can download all current shift assignments into a CSV file, then upload your changes to the schedule.
Shift assignments must be published before the employee can see them on their schedule. You can choose to publish the shift while you are assigning it or you can wait until later.
Consider using the Shift Assignment report template to find current shift assignments, and shifts that have not yet been assigned.
Assigning schedules
Assigning shifts individually
To assign a shift to an employee:
- Go to Schedule.
All the employees who are set up for shift scheduling are shown in the table.
- Navigate to the period that you want to schedule by clicking the arrows next to the dates or by clicking on the dates themselves.
- Use the filters to search for specific users and find the row for the user you want to schedule.
Any time off the user has booked is shown on the schedule.
You can use the No User row to plan out the shifts you need for each day before assigning them to users. This helps ensure you have adequate coverage for the day.
- Under the date you want to schedule the user for, click the
icon on the right edge of the cell.
Move your mouse over the area to see the icon.
- Select the shift you want to assign for that day.
- If needed, edit the default shift times.
- Enter a note for the employee in the Note field.
- If you want to publish the shift right away, change the Status to Published.
If not, you can publish it later, once the schedule is finalized.
- Click Save.
The shift assignment is shown in the grid, color-coded based on the selected shift. If you changed the shift times from their default values, the new times are shown under the shift name.
After adding shift assignments, you can see the number of shifts scheduled for each day and the total work hours. You can also see the total work hours and break hours for each user.
Assigning multiple shifts at once
Instead of assigning shifts individually, you can assign a shift to multiple users at once, or assign a shift for multiple days.
To assign multiple shifts at once:
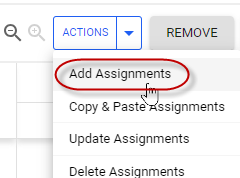
- Go to Schedule > Employee View > Actions > Add Assignments.
- Select the users to assign the shift to from the Select Users drop-down.
You can enter text to search and you can select multiple users. To assign the shift to all users, select All Users.
- Select the date range for which to assign the shift.
- Choose which days to assign the shift.
- Select the shift to assign.
- Edit the default shift times if necessary and add a note for the employees.
- Click Apply.
The shift is assigned to the selected users for the selected dates.
- Click Close to exit or click Continue Editing to assign shifts to other users.
After the shifts assignments are created, publish them to make them visible to the employees.
Copying a schedule
You can copy a schedule from one week to the next. This helps save time if your schedule stays relatively consistent week to week. Instead of starting from the beginning, you can copy the previous schedule and adjust it as necessary. You can copy all of the schedule's shift assignments, or copy assignments for particular users or shifts.
Any new shift assignments created by copying will be unpublished by default.
To copy a schedule:
- Go to Schedule > Employee View > Actions > Copy & Paste Assignments.
- Under Select Users, select All Users to copy assignments for all users, or select specific users to copy.
You can enter text to search and you can select multiple users.
- In the Copy From fields, select the date range to copy.
- In the Paste To field, select the starting date for where to copy the assignments.
The start of the Paste To period must be the same day of the week as the start of the Copy From period. For example, if you are copying a period that start on Sunday, the first Paste To field must be set to a Sunday. The end date is automatically set to match the length of period being copied.
- In the Shift drop-down, select Any Shift to copy assignments for all shifts, or select a shift name to copy assignments just for that shift.
- Click Apply and then click Close.
The shift assignments will be copied to the target date range. Once finalized, the new schedule can be published.
Downloading and uploading a schedule
You can download and upload schedules on the Schedule > Employee View page. Schedules are typically downloaded so schedule managers can make edits to them using a spreadsheet, before re-uploading the updated version to the Schedule page. Schedules are downloaded and uploaded via CSV file.
Editing schedules using a spreadsheet has some advantages, such as allowing you to use the spreadsheet editing features to make changes. Plus, spreadsheets allow you to easily copy longer-term schedules for employees, by adding additional dates to a downloaded spreadsheet, and copying shifts to those dates.
Fields you can download and/or upload
|
Field name |
Description |
Downloaded by default |
Can be optionally downloaded |
Can be uploaded |
|---|---|---|---|---|
|
Date |
✓ |
✓ | ||
| Employee Name | ✓ | |||
| Employee Login Name | ✓ | ✓ | ||
| Shift Name | ✓ | ✓ | ||
| Status | Whether the shift is Published or Unpublished | ✓ | ✓ | |
| Note | Optional information included for the employee | ✓ | ✓ | |
| Time Off | ✓ | |||
|
Shift Start Time Shift End Time |
✓ | |||
| Schedule custom field | ✓ | ✓ |
You can't modify shift start and end times using the upload feature.
Downloading a schedule
To download and edit a CSV:
- Go to Schedule > Employee View.
- Ensure the date range at the top of the page is set to the dates you want to download, and confirm the filter settings are as desired.
When you download data, the current date range and any filter settings will be used to limit what data is downloaded.
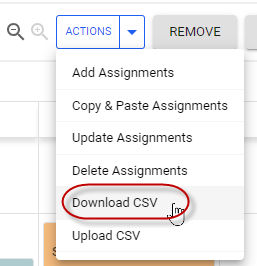
- Click Actions > Download CSV.
- In the Download CSV dialog that displays, choose which fields you want to download.
- Click Download CSV.
The CSV file will be saved to your download folder. You can open it using any spreadsheet software that supports the CSV format -- for example, Excel or Google Sheets.
When you open it, the file will show the fields you selected in the top row, with a row for each date/employee within the range you selected; even dates without data display, to give context when editing.
![]()
- Update the shifts and details, as required, and save the data using the CSV format.
Uploading a schedule
Schedule managers require Shift Upload permission in their Schedule Manager permission set before they can upload schedules.
To upload a schedule:
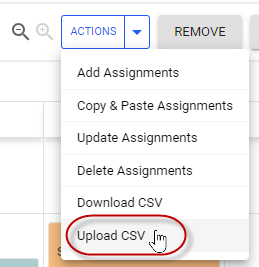
- Go to Schedule > Employee View > Actions > Upload CSV.
The Upload CSV page displays.
- If you don't already have a downloaded and edited file saved, click Download a sample file and save your data in the file using the format given.
- On the Upload CSV page, click Upload CSV File, then find your file and click Open.
Once the file is uploaded, the file name should display next to the Upload CSV file button.
- Ensure the First row contains column names check box is set appropriately, so the import knows whether to import or ignore the column names.
- Handle any validation issues that are already marked. Then click Validate, and fix any additional errors detected.
For information on dealing with validation issues, refer to Handling validation issues for imports. This section includes information on handling date formatting issues. After fixing any issues detected after clicking Validate, you'll need to re-upload the import file.
- Click Import.
The file's data will populate the schedule. If data already exists for the range/employees included, that data will be overwritten.
Data validation
Before it’s entered onto the Schedule page, your data will be validated for correct name and date formatting. However, uploaded data is not currently validated against pay rules or other compliance rules.
There is an option to override validation when uploading a file. If you choose this option, all valid data will be updated; invalid data will not be changed.
Publishing a schedule
By default, the shifts that you schedule are unpublished. Unpublished shifts are not shown to employees on their schedule. Once the schedule is finalized, you can publish the shift assignments so they are visible to employees. This allows you to work on your schedule over a period of time before making it available to employees.
Unpublished shift assignments are shown with stripes, whereas published shift assignments are shown in a solid color. Both published and unpublished assignments are included in the totals shown on the Schedule page.
There are a few ways to publish shift assignments:
You can publish all the shift assignments shown in the current view of the schedule. This option will typically be used once the full schedule is finalized.
You can publish shift assignments for specific users or a particular shift. You may want to publish a user’s schedule ahead of others if that user needs advanced notice of their schedule.
You can publish shift assignments on an individual basis. This may be useful when you are adding a shift assignment to a previously published schedule.
You can publish shifts by uploading them with Published status.
When necessary, previously published assignments can be unpublished, which hides them from the employee’s view.
Publishing all the visible shift assignments
Using the Publish button, you can publish all the shift assignments currently visible on the Schedule page.
To publish all the visible shift assignments:
- Go to Schedule > Employee View.
- Select the date range you want to publish for.
- Set the filters above the schedule to include all of the assignments you want to publish.
- Click the Publish button.
The buttons shows how many unpublished shift assignments will be published.
- Click Ok when asked to confirm.
All the shift assignments will now be set to the Published status.
Publishing shift assignments by user or shift
If you want to publish a sub-set of the shift assignments, you can do so using the Update Assignments option.
To publish a group of assignments:
- Go to Schedule > Employee View > Actions > Update Assignments.
- Under Select Users, select All Users to publish assignments for all users. Or select specific users to publish.
You can enter text to search and you can select multiple users.
- Select the date range you want to publish for.
- If applicable, select which shift you want to publish. Otherwise, leave it set to Any Shift.
Only assignments for that shift will be published.
- Set the Status field to Published.
- Click Apply.
All of the shift assignment matching the selected users, date range, and shift will be published.
Publishing a single shift assignment
To publish a single shift assignment:
- Go to Schedule > Employee View.
- Click on the shift assignment you want to publish.
- Select Published from the Status drop-down.
- Click Save.
The assignment is now published.
Unpublishing shift assignments
You can unpublish shift assignments to remove them from the employee’s view. You may want to unpublish shift assignments when you have to make larger changes and want to retract the original schedule.
To unpublish shift assignments, follow the same steps as above but use the Unpublish button or select Unpublished as the Status.
FAQs
Why can’t I see some employees on the Schedule page?
The employee may not be set up for shift scheduling, or you may have filters set that exclude certain users. Alternatively, your administrator may have limited your access to specific groups of employees.
How can we easily move or copy shifts when adding and editing assignments?
You can drag and drop shifts, either individually or as a group. To do this, select a shift and drag it to a new cell while holding down the selection button. To move multiple shifts, drag over the shifts to select them, or select individual shifts while pressing the Ctrl button (PC) or Command button (Mac), then click on and drag one of the selected shifts.
You can copy a shift across a row or column by selecting a cell, and dragging the orange box that displays horizontally or vertically.
You can also use the CSV download/upload feature, and edit using a spreadsheet.
How can we delete multiple shifts?
Drag over multiple shifts to select them, or select individual shifts while pressing the Ctrl button (PC) or Command button (Mac). Then, click the Remove button at the top of the page.
You can also go to Actions > Delete Assignments, to choose shifts to delete.
How are users notified about changes in shifts?
Typically, administrators enable the shift notification that informs users about new shifts, or updates to existing shift assignments. You can ask your Replicon Administrator to enable notifications for your team.
Related links
How shift scheduling works
Setting up schedules (video)
Setting up shifts
Setting up users for shift scheduling
Defining work days and times using office schedules


